App Roles With Azure Active Directory for Blazor App
In this article, we are going to learn how to use App Roles from Azure Active Directory to provide a greater level of security for our apps.
Azure Active Directory (AAD) is a popular cloud-based identity and access management solution that allows organizations to manage and secure user authentication and authorization for their applications and services. In this blog, we will focus on how to add App Roles with Azure Active Directory for a Blazor server app.
Blazor is a web application framework that allows developers to build interactive web UIs using C# instead of JavaScript. A blazor server app run on the server and communicate with the client using SignalR, a real-time communication protocol. Adding App Roles to a Blazor server app is essential to control user access to resources and features based on their roles.
Here are the steps to add App Roles to a Blazor server app with Azure Active Directory:
Step 1: Create an Azure AD App Registration
- Go to the Azure Portal and sign in with your Azure account.
- In the left menu, click on Azure Active Directory.
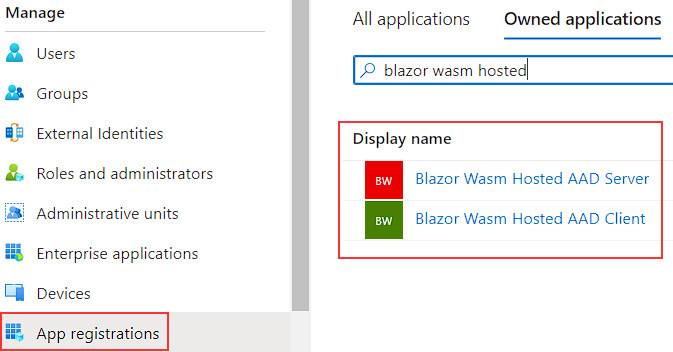
- Under Manage, click on App registrations.
- Click on New registration.
- Enter a name for the app registration and select the appropriate account type.
- Under Redirect URI, select Web and enter the URL for your Blazor server app.
- Click on Register to create the app registration.
Step 2: Add App Roles to the Azure AD App Registration
- Go to the app registration you just created.
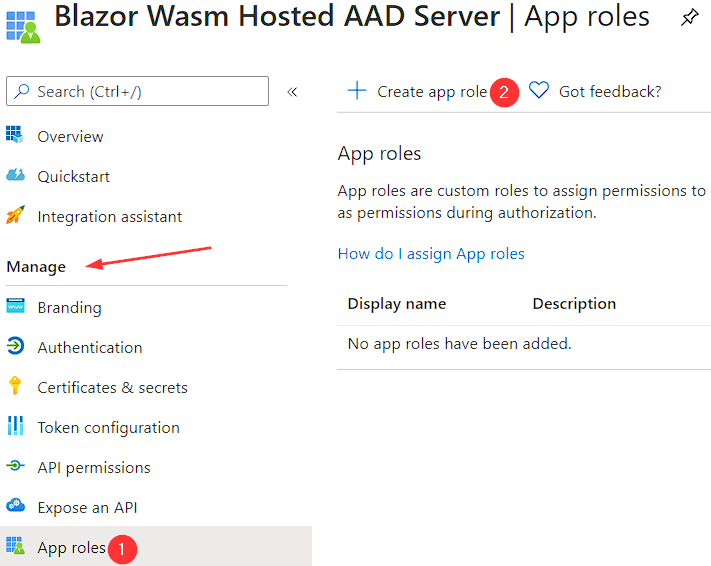
- Under Manage, click on App roles.
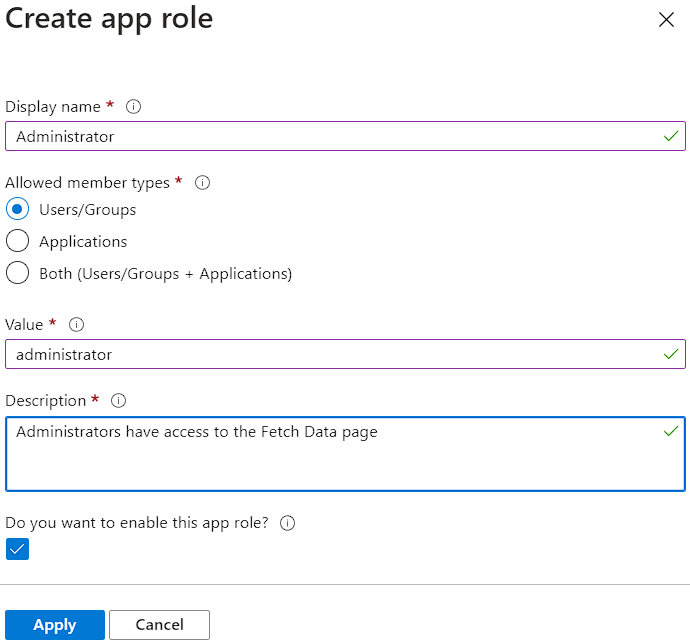
- Click on Create app role.
- Enter a name for the app role and a description.
- Under Allowed member types, select User.
- Click on Add condition and select an attribute that will be used to determine the role.
- Click on Create to create the app role.
Step 3: Modify the Blazor Server App to use Azure AD for Authentication and Authorization
- Open your Blazor server app in Visual Studio.
- Right-click on the project in the Solution Explorer and select Add > Connected Service.
- Select Azure Active Directory and click on Configure.
- Enter the Tenant ID and Client ID for the Azure AD app registration you created earlier.
- Under Authentication, select ID tokens and Access tokens.
- Under Authorization, select App roles and enter the name of the app role you created earlier.
- Click on Finish to complete the configuration.
Step 4: Implement Authorization in the Blazor Server App
- Open the Startup.cs file in your Blazor server app.
- In the
ConfigureServicesmethod, add the following code (C# example):
services.AddAuthentication(AzureADDefaults.AuthenticationScheme)
    .AddAzureAD(options => Configuration.Bind("AzureAd", options));

services.AddAuthorization(options =>
{
    options.AddPolicy("RequireUserRole", policy => policy.RequireRole("AppRoleName"));
});
- In the
Configuremethod, add the following code (C# example):
app.UseAuthentication();
app.UseAuthorization();
- In the Blazor component that requires authorization, add the
[Authorize(Policy = "RequireUserRole")]attribute.
[Authorize(Policy = "RequireUserRole")]
public partial class MyComponent : ComponentBase
{
    // component code
}
That’s it! You have successfully added App Roles with Azure Active Directory for your Blazor server app. Now, only users with the appropriate roles will be able to access the resources and features of your app.
Thank you for reading. Stay Safe, Stay Secure!