How to Get Free SSL for Your Website
Welcome to Secumantra! In this post, we will learn how to enable SSL certificate for free on your WordPress website using Cloudflare.
Data transmitted over an unencrypted channel (plain http) is insecure and can be intercepted. All the data must be encrypted while in transition and it is site owner’s responsibility to protect the security, privacy and integrity of user’s data. That’s why we need HTTPS!
Implementing HTTPS may seem to be a complex and costly affair for a normal user. Let’s see how easy and fast it can be achieved using Cloudflare. Simply follow the 5 steps mentioned below.
1. Create an account on Cloudflare
Visit https://www.cloudflare.com/ and click Sign Up. It will prompt an account creation window. Enter your email ID and password to create an account on Cloudflare. This is the website platform which is providing us free SSL. Once you have an account, you can add multiple sites there.

2. Add your website to Cloudflare account
When your account on Cloudflare is successfully created, it automatically takes you to the portal to add your website. Enter your website name and click ‘Add Site’.

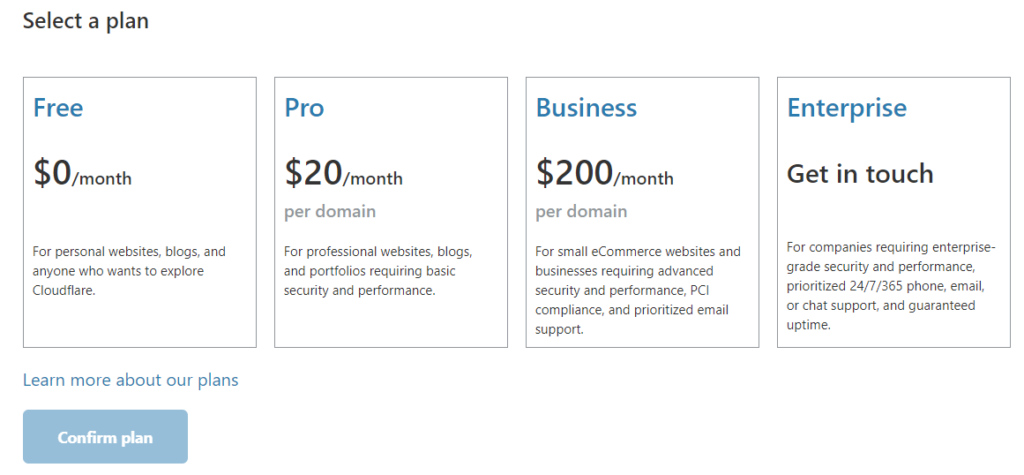
3. Select a Cloudflare plan
It takes you to the next page where we need to select a plan. Let’s choose ‘Free’ one and click ‘Confirm Plan’. For most of the small business and individual sites, this plan is sufficient.
4. Change your Nameservers
Cloudflare automatically detects your domain provider and provides link to login. Otherwise it will request you to do so by finding your registrar using WHOIS.
Now you need to login to your domain provider’s website and point Nameservers to Cloudflare.
For example, if you have bought your domain from Namecheap. Go to DNS tab for the domain and add custom nameservers given by the Cloudflare. Save the changes you made.
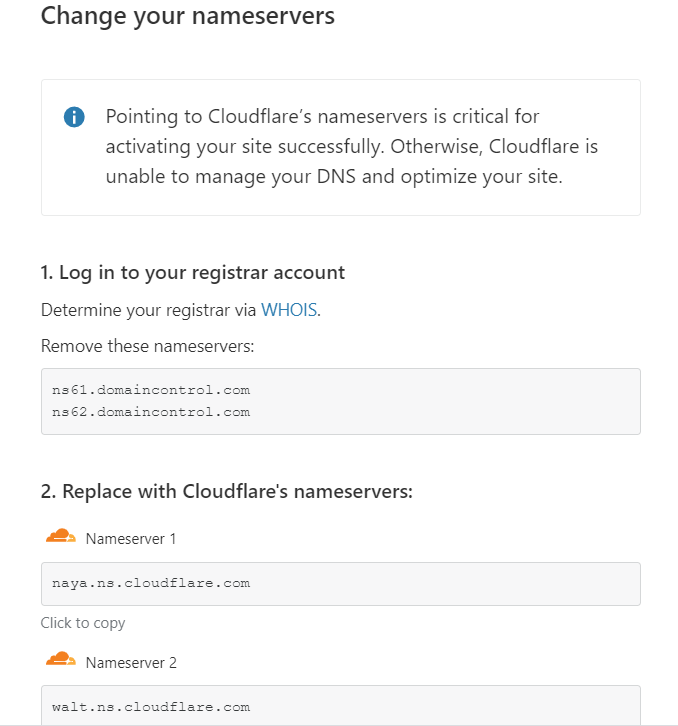
Now we have successfully added the nameservers to our domain. It might take upto 24 hours to update the nameservers and you will get a confirmation email from Cloudflare once activation is done.
5. Setup SSL/TLS encryption mode
Now go back to Cloudflare account and visit SSL/TLS tab. Please refer image.
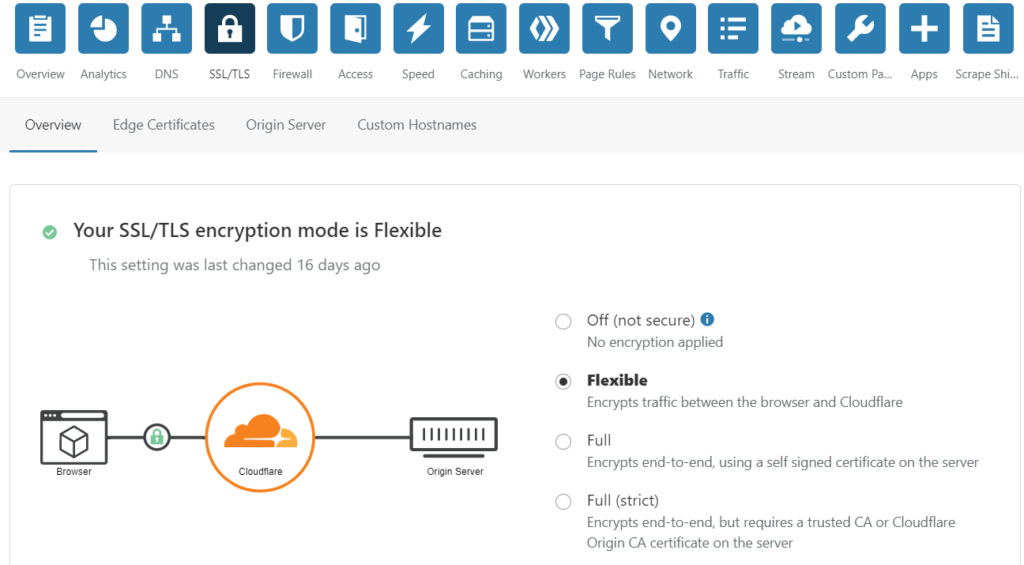
The Flexible SSL option allows a secure HTTPS connection between your browser and Cloudflare, but forces Cloudflare to connect to your web server over unencrypted HTTP. An SSL certificate is not required on your web server and your visitors will still see the site as being HTTPS enabled.
Enable ‘Always Use HTTPS‘ option. It will redirect all requests with HTTP protocol to HTTPS. As of now this setting is under Edge Certificates tab of SSL/TLS.

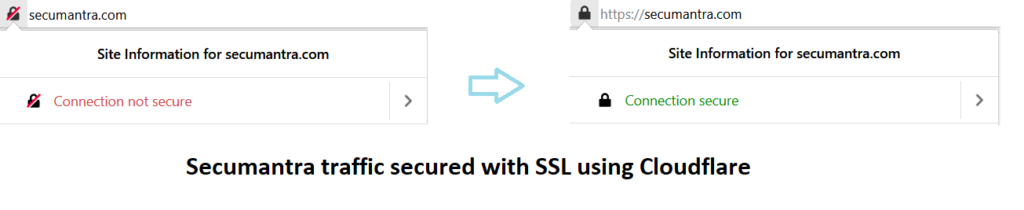
Congratulations! Your site is served securely now (having SSL and pad-lock icon) and will always redirected to HTTPS. It might take few minutes to configure everything and see the results though.
Conclusion
Using free SSL by Cloudflare, HTTPS can be easily configured for your site and all non-secure requests are redirected to the secure scheme.
Cloudflare not only solves the security problem, it gives us some additional benefits like redirecting to HTTPS, caching etc.. It solves cost and complexity problem with a performance boost while serving the content securely. There are multiple advantage of having SSL to your website. Let’s make the web more secure.
Thank you for reading, hope it is useful. Stay Safe, Stay Secure!