How to Create a Self-Signed SSL Certificate
Welcome to Secumantra! In this post we will learn how to generate a self-signed SSL certificate for your website or web service.
What is a Self-Signed SSL Certificate?
A self-signed certificate is an SSL certificate that has not been validated by a Certificate Authority (CA). It is created by the developer of the application locally and that’s why it is called ‘self’ signed.
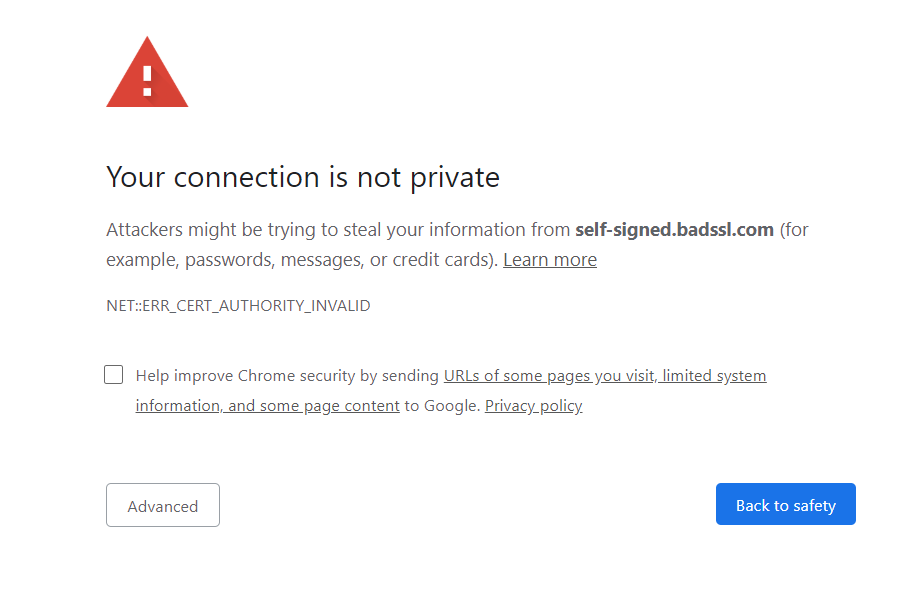
Although self-signed certificate implements full encryption, visitors to your site will see a browser warning indicating that the certificate should not be trusted. For this reason, these types of certificates are only recommended for development purpose or internal use.
When you are in development phase and building web applications locally, you might want to test them over HTTPS. For this you are going to need a SSL certificate but you might not want to purchase one from Certificate Authorities (CA). As this is just a local development where we just want to able to create a HTTPS connection, it doesn’t matter whether it is a valid CA or not.
As a trusted CA did not sign it, browsers cannot trust it. Visitors to your site will see a warning, though it will function normally. Here is an example –
The good news is that you can avoid the costs associated with the SSL certificate by using a self-signed SSL certificate. On Windows, this is easy to do with PowerShell. For other systems, you can look at OpenSSL.
How to Create Self-Signed Certificates with PowerShell
You might be familiar with or heard of the MakeCert.exe utility, which allows us to create a self-signed certificate. This tool is included in the Microsoft .NET Framework SDK and Microsoft Windows SDK. We are not going to use this here.
PowerShell Commands
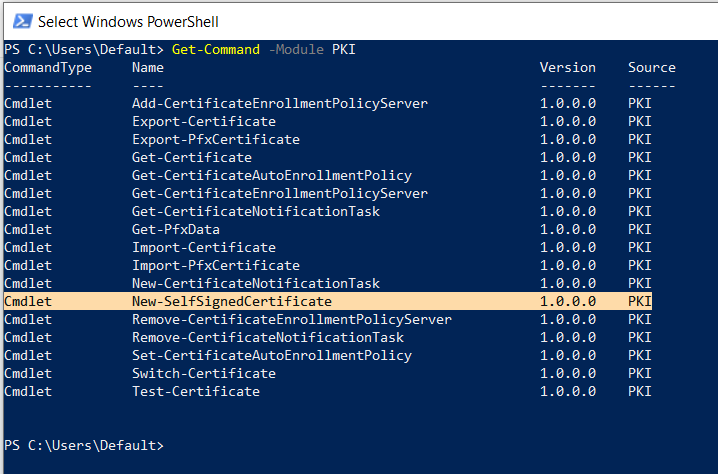
That is an old school way and a self-signed certificate can be created using PowerShell 3.0 (or higher) without any special tools. As a part of PKI module, PowerShell provides New-SelfSignedCertificate cmdlet, which we will use to create a self-signed certificate in this example.
Now this single cmdlet New-SelfSignedCertificate creates a new self-signed certificate for testing purposes. It has many different input parameters.
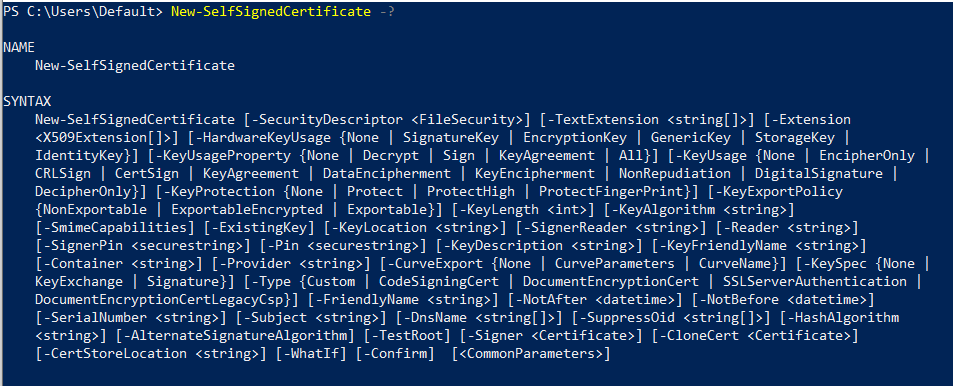
Minimum we need to specify the values of –DnsName (DNS name of a server, the name may be arbitrary and different from localhost name) and -CertStoreLocation (a local certificate store in which the generated certificate will be placed).
Let us consider that we want to create a certificate for the DNS name of blog.secumantra.com and put it in the list of personal certificates on computer, run following command –
New-SelfSignedCertificate -DnsName blog.secumantra.com -CertStoreLocation cert:\LocalMachine\MyNote: You need to run PowerShell under adminstative previlages for creating new self-signed certificate.
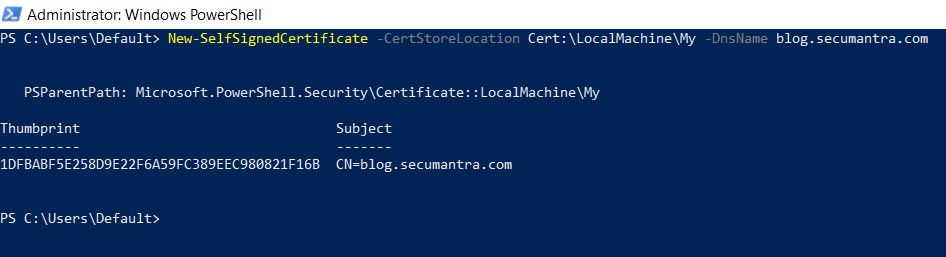
You can see the thumbprint for the certificate in the result window when you run the command along with the subject.
Where to see certificate details?
This command creates a certificate and imports it in a personal store of the computer. You can verify this by running certlm.msc and checking that a new certificate entry in the Personal section of the certificate storage.
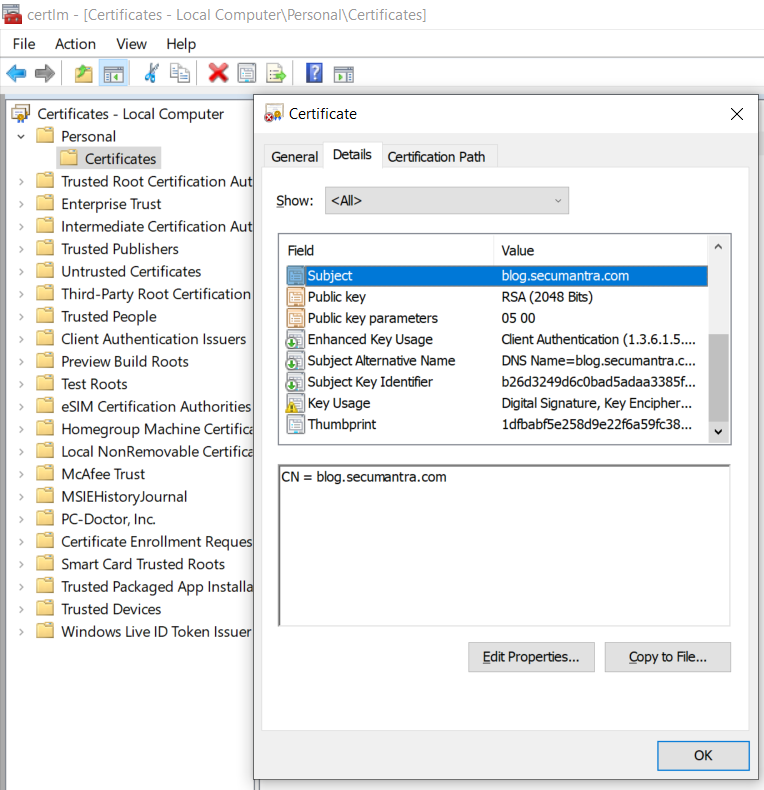
A self-signed certificate is generated with some default settings like validity, key length etc. You can open the certificate and see all the properties under details tab. By default a self-signed certificate is valid for 1 year from the date of its creation.
Now if you want to share this certificate with someone else, you need to export this to a file (*PFX format). So let’s set a password and export the certificate using below command –
$certPassword = ConvertTo-SecureString -String “PasswordString” -Force –AsPlainText
Export-PfxCertificate -Cert cert:\LocalMachine\My\1DFBABF5E258D9E22F6A59FC389EEC980821F16B -FilePath C:\self-signed-cert.pfx -Password $CertPassword
Note that you need its thumbprint, so remember to copy it from the results of New-SelfSignedCertificate command.
Now we have a self-signed certificate in *pfx format which we can install or import somewhere else. The certificate public key can be exported using:
Export-Certificate -Cert Cert:\LocalMachine\My\1DFBABF5E258D9E22F6A59FC389EEC980821F16B -FilePath C:\self-signed-cert.cerIf you want to import it back or somehwere else, you can use below command:
Import-PfxCertificate -Password $certPassword -FilePath C:\self-signed-cert.pfx -CertStoreLocation 'Cert:\CurrentUser\My'It is almost similar to export certificate command and that makes sense.
Congratulations! You have successfully created a self-signed SSL certificate which can also be imported or installed somewhere else.
Python Flask Scenario
Python is the standard language of machine learning. All major frameworks have Python bindings, and virtually all data scientists/machine learning engineers are familiar with it.
To productionize a machine learning model, the standard approach is to wrap it in a REST API and deploy it as a microservice. Flask is currently the de facto choice for writing these APIs.
The Simplest Way
While working with Python Flask application, we normally run the development web server, which provides a basic, yet functional WSGI complaint HTTP server. Flask is based on Werkzeug WSGI toolkit and Jinja2 template engine.
Flask, and more specifically Werkzeug, support the use of on-the-fly certificates, which are useful to quickly serve an application over HTTPS without having to mess with certificates. All you need to do, is add ssl_context='adhoc' to your app.run() call.
from flask import Flask
app = Flask(__name__)

@app.route("/")
def hello():
    return "Hello World!"

if __name__ == "__main__":
    app.run(ssl_context='adhoc')
To use adhoc certificates with Flask, you need to install an additional dependency in your virtual environment: pip install pyopenssl
Browsers do not like this type of certificate, so they show a big and scary warning that you need to dismiss before you can access the application. Once you allow the browser to connect, you will have an encrypted connection, just like what you get from a server with a valid certificate, which make these ad hoc certificates convenient for quick & dirty tests, but not for any real use.
Using OpenSSL
The ad hoc certificates from Flask are not that useful, because each time the server runs, a different certificate is generated on the fly through pyOpenSSL. When you are working with a self-signed certificate, it is better to have the same certificate used every time you launch your server. It allows you to configure your browser to trust it, and that eliminates the security warnings.
Instead we can generate a self-signed certificates easily from the command line. All we to have is openssl installed:
openssl req -x509 -newkey rsa:4096 -nodes -out cert.pem -keyout key.pem -days 365This command writes a new certificate in cert.pem with its corresponding private key in key.pem, with a validity period of 365 days. When you run this command, you will be asked a few questions.
We can now use this new self-signed certificate in our Flask application by setting the ssl_context argument in app.run() like –
from flask import Flask
app = Flask(__name__)

@app.route("/")
def hello():
    return "Hello World!"

if __name__ == "__main__":
    app.run(ssl_context=('cert.pem', 'key.pem'))
Summary
We don’t have the same security requirements on the localhost as a public facing site. The primary purpose of a self-signed certificate is to develop locally using HTTPS for development purposes. It also saves development cost.
Self-signed certificates offer encrypted communication over HTTPS similar to certificates issued by a Certificate Authority (CA). This in itself does not make self-signed certificates secure.
For example, self-signed certificates are vulnerable to man in the middle attacks if they are not properly installed and trusted. Since the only way to trust a self-signed certificate is to manually import the certificate in the trusted root CA store for every device visiting the site, self-signed certificates are effectively insecure by default, and this is one of the main reasons you should never use self-signed certificates in production.
If you don’t want to manage all this stuff yourselves and you are just designing a website or WordPress blog, you can easily make your website serve over HTTPS by enabling a free SSL certificate from third party services like Cloudflare or Let’s Encrypt.
Thank you for reading. Stay Safe, Stay Secure!